How to Install a Check Valve on a Well Pump: A Comprehensive Step-by-Step Guide
Introduction
Well pump is the core equipment in the water supply system. It extracts water from the ground, pressurizes it and delivers it to ensure stable water pressure, continuous water supply and meet water demand. The check valve is a one-way flow control valve that can automatically close to prevent medium backflow, avoid water pollution, equipment damage, pressure imbalance, ensure safe operation of the pipeline.
Importance of Proper Installation
H3: Importance of correct installation
The check valve can prevent pipeline damage, main efficient operation of the system, and prevent the pump from reversing due to backflow and damaging mechanical parts.
Improper installation will increase energy consumption and threaten stability water supply.
The tools required are pipe clamps, wrenches, raw tape, sealant, check valves, and adapters.
1. Cut off water and electricity and cut off the pipeline;
2. Wrap the interface with raw tape and apply glue;
3. Install the valve according to the flow direction and tighten it;
4. No leakage in the water flow test.
Troubleshooting: Leakage needs to be resealed; there is an abnormal sound in the direction of the check valve body; clear the blockage when the pressure is unstable.
Regularly check whether the seal is intact, clean impurities, and test the opening and closing flexibility.
Understanding Check Valves and Their Applications
What is a Check Valve?
A check valve is an automatic valve that allows only one-way flow of fluid.A check valve allows only one-way flow, and automatically opens and closes by medium pressure to prevent backflow. A ball valve controls two-way opening and closing by rotating the ball. A stop valve uses a valve disc to adjust the flow. The three have different functions and operating mechanisms..
Types of Check Valves Used in Well Pump Systems
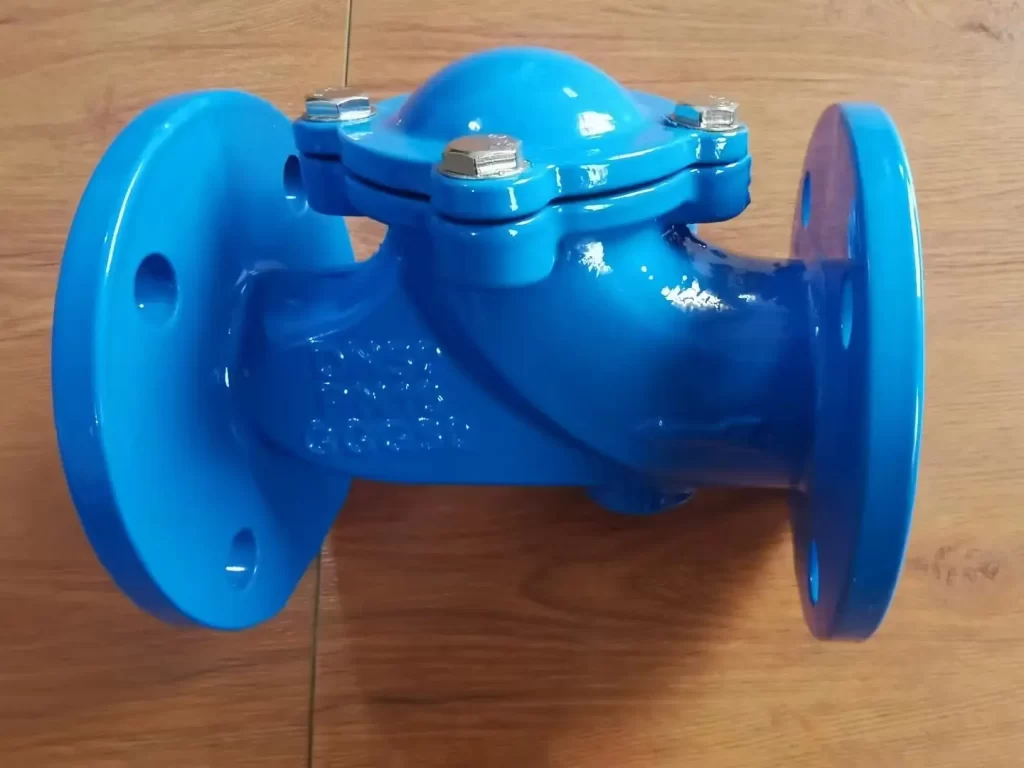
1. Swing check valve
Features: The valve disc rotates around axis open and close, suitable for large-flow horizontal pipelines.
2. Ball check valve
Features: The ball valve core rolls and seals, with a simple structure.
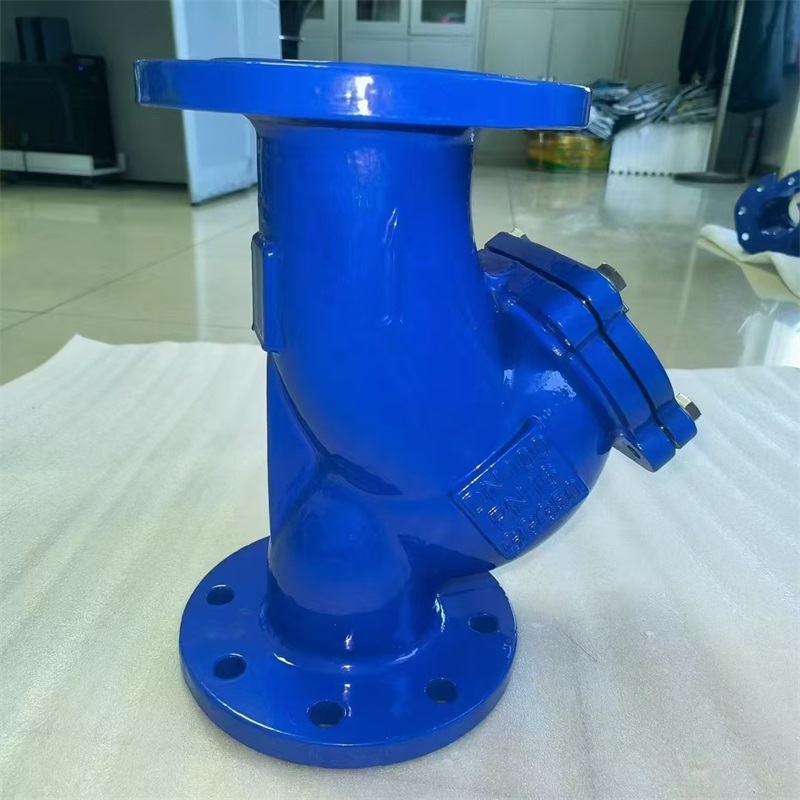
3. Spring check valve
Features: Spring-assisted rapid closing, vertical/horizontal..
Benefit of Installing a Check Valve
The check valve automatically blocks the backflow of the medium when the pump is shut down through a one-way opening and closing mechanism to prevent damage to the impeller and seals due to reverse impact.
Tools and Materials Required
Essential Tools
Adjustable wrench/pipe wrench
Screwdriver (straight/cross)
Pipe cutter/cutter
Materials and Parts
Well pump check valve selection and accessories
Recommended models: Spring check valve (e.g. Vortex 750 for deep well pumps), brass ball valve (water with sediment).
Accessories: Fitting flange/threaded joint (material of the same pipe), EPDM gasket, stainless steel clamp.
Quality: 304 stainless steel or corrosion resistant engineering plastic valve body is preferred, matching the rated pressure of the well pump (≥1.6MPa).
Compatibility: Confirm the pipe size (DN25-DN50) and interface type (NPT/BSP) to avoid electrochemical corrosion of the material.
Safety Equipment and Precaution
Necessary equipment: anti-cutting gloves (anti-metal debris), anti-impact goggles (anti-splash), anti-slip protective shoes, long-sleeved protective clothing.
Importance: Before operation ensure system is decompressed and powered off. Use qualified tools to avoid touching sharp edges or high-pressure liquids by mistake. Standard operation can prevent cuts, chemical sputtering and mechanical injuries to ensure safety and installation reliability.
Step-by-Step Installation Process
Pre-Installation Preparation
Installation preparations: Power off → Drain water in pipes and pumps → Clean interfaces to avoid impurities. Safety verification: The pressure gauge is zero, the power is checked to confirm the power failure, and there is no leakage in the eye inspection to ensure operation is risk-free.
Removing the Old Valve or Preparing the System for a New Installation
Safe removal of old valve steps
Pressure relief: turn off the power and drain the residual water pressure in the pipeline and pump.
Remove the connection: loosen the bolt/thread counterclockwise with a wrench and wear cut-proof gloves to prevent scratches.
Remove valve: Tap valve body separation flange to avoid violent disassembly and damage to pipe.
Preparation for system check
Check pipes: Remove rust and sealant residue to ensure smooth interfaces.
Verify the sealing surface: Grind the contact surface of the flange with sandpaper to confirm that there is no crack or corrosion.
Pressure test: temporarily plug the pipeline, water to observe whether leakage, ensure that the pressure qualified after installing a new valve.
Installing the Check Valve
Confirm the flow direction: the arrow marked on the valve body must be consistent with the direction of water flow (pointing to the pump outlet), and pay attention to the direction of the gravity-assisted closure of the valve disc when vertically installed.
Pretreatment interface: Wrap 3-5 turns clockwise with raw material belt at the thread connection, or apply appropriate amount of pipe sealant (anaerobic rubber for metal, silicone rubber for PVC).
Fastening connection: manually screw the valve into the pipe, and then slowly tighten it with a wrench (to avoid overtightening the valve body deformation). Flange type bolts should be tightened diagonally and evenly.
Seal test: After installation, the water is pressurized to 1.5 times the working pressure, and the valve body and the interface are checked for leakage.
Note: Metal thread do not use PVC glue, flange gasket should be center pressed flat, after installation regularly clean the valve cavity impurities.
.
Testing the Installation
System restart and test procedure
Slow start: Turn on the pump gradually after powering on, observe the pressure gauge rise to the set value, and confirm that there is no violent fluctuation.
Function verification: Check whether the valve is closed immediately after stopping the pump (no backflow sound), the pressure gauge should slowly decline rather than plummeting.
Leakage detection: wipe the valve body interface and sealing surface with a paper towel to observe no water seepage; Apply soapy water to the flange to check for bubbles.
troubleshooting
Leaks: Re-tighten threads/bolts and replace sealant or gasket.
Valve not closed: Remove the valve chamber to remove foreign matter, or replace the spring/disc.
Abnormal pressure: Check the pipeline blockage or pump matching, and confirm that the check valve pressure level meets the system requirements..
Troubleshooting Common Issues
Identifying Installation Errors
Common mistakes: the direction is reversed (the arrow is not on the water flow), the connection is not tight (the interface is leaking), and the sealant is not enough.
Discovery method: eye check the flow direction sign, observe the leakage and valve closure state after water flow, and sudden drop of pressure indicates failure.
Diagnosing Performance Problems
Troubleshooting Procedure
Flow reduction: check whether the direction of the valve is correct, remove the valve to see whether the valve chamber is blocked by foreign matter; Compare the pressure difference between the front and back of the valve, and if it increases significantly, the valve is blocked.
Abnormal noise: listen to the sound positioning, if the noise appears with the valve opening and closing, it may be the valve disc impact (spring failure or foreign body blockage); Continuous humming requires checking for pump cavitation or pipe resonance.
Distinguish the root cause: short-time bypass valve, if the problem disappears, it is a valve fault, otherwise check the pump body or pipeline.
Preventative Maintenance Tips
Maintenance Suggestions:
Regular inspection: monthly visual inspection of the interface leakage, listen to the disc closing sound is crisp, measure the pressure difference to determine the blockage.
Cleaning: Remove the valve cavity every quarter to remove impurities (sand/scale), soft brush + neutral cleaning agent to wipe the sealing surface, do not scrape hard objects.
Lubrication: The articulated disc is lubricated with silicone grease every year, and the spring valve is checked for elastic fatigue.
Replacement: The rubber sealing ring is replaced every 2 years, and the corroded valve body is upgraded in time.
Tip: When the pump is stopped, drain water in the valve, anti-freezing in winter, abnormal vibration immediately check the blockage.
Maintenance and Long-Term Care
Routine Inspection and Cleaning
Daily inspection (monthly)
Visually detect the leakage of the interface and listen for the abnormal closing sound of the valve disc.
Record system pressure fluctuation and determine whether it is caused by increased valve resistance.
Cleaning and anti-fouling (quarterly)
Remove valve chamber sediment/scale (neutral detergent + soft brush), rinse with food grade silicone grease for anti-sticking.
Check the flatness of the sealing surface, and lightly grind the rust with sandpaper and spray the anti-rust coating (such as WD-40).
Deep maintenance (yearly)
Comprehensive disassembly: replace the aging seal ring, spring, and lubricate the hinged shaft (high temperature lithium grease).
Pressure test: water pressure to 1.5 times the working pressure, for 10 minutes without leakage.
Anticorrosion suggestion
When the water quality is poor, the filter is installed to reduce the erosion of particles;
304 stainless steel or CPVC valve body is preferred, and the hard water area can be regularly pickled.
Tip: Stop draining water in winter, abnormal vibration immediately stop pump check! Preventive maintenance reduces failure rates by 80%.
When and How to Replace the Check Valve
Check valve failure Signs:
Leakage: interface or valve body seepage, sealing ring aging or disc wear.
Abnormal sound: abnormal sound when opening and closing (spring break/disc blockage), continuous vibration during operation (water hammer effect).
Abnormal water pressure: sudden drop of pressure (not closed to reverse flow) or unstable flow (partial blockage).
Backflow: Pipe backflow sound after stopping the pump, the valve can not be completely closed.
Troubleshooting methods: eye inspection of sealing surface, water test closure response, pressure gauge to monitor pressure difference, reverse water injection to observe whether leakage.
Enhancing the Longevity of Your Well Pump System
Daily maintenance:
Regularly lubricate pump bearings and motor parts, check coupling to avoid vibration wear.
Keep the motor heat sink clean to prevent overheating and burning.
Operation optimization:
Avoid frequent start and stop of the pump to reduce water hammer impact; Install a pressure buffer tank or variable frequency controller to regulate flow.
It is recommended to install water softener in hard water area to reduce scale deposition.
System upgrade:
Replace old pipes with corrosion-resistant materials (e.g. PPR/ stainless steel) and reinforce the support to prevent stress deformation.
Add pressure sensor and remote monitoring, real-time warning of abnormal parameters.
Professional inspection:
System efficiency, shaft seal wear and electrical insulation are tested annually by engineers.
Use ultrasonic detector or infrared thermal imager to detect the hidden dangers of leakage in the valve body and cavitation of the pump body in advance.
Tip: Record maintenance logs to track the life of spare parts; Extreme environments (high temperature/high humidity) need to shorten the maintenance cycle, check the waterproof seal before the rainy season!
Conclusion
Step summary: In the preparation stage, power off pressure relief, clean the interface to ensure safety; When installing, strictly align the flow direction (arrow toward the pump outlet) and seal to prevent leakage; Test to verify closure tightness and pressure stability. Advantages of correct installation: block backflow, protect pump body, maintain stable water pressure, and improve system efficiency. Long-term reliability recommendations: Clean the valve cavity every quarter, check the seals annually, and troubleshoot any anomalies immediately; Consulting professional engineers for complex problems and regular system evaluation can prevent sudden failures and extend equipment life.